MUDSTUFF Dash Console

The “dashboard ” of older Defenders between the drivers panel and the passenger door is notable for its very basic design.   It is very much function over form, and the function is pretty basic.   There is no “glove-box”,  just a 4′ wide, open area with a 2″ high lip along the bottom edge to keep anything from falling out onto the floor.   There are two  large “ventilator control” levers used to raise the two 2′ x 4″ metal covers than run outside between the windshield and bonnet.  There is a a simple switch panel in the lower central section of the dash that almost seems like an afterthought to hold the cigarette lighter and the switch for the rear windshield washer.  As to where one puts a radio I was left guessing.  Our vehicle  must have had a radio and other electrical accoutrements at some point, the motley collection of wires that protrude from a hold in the bottom of the dash attest to that.   Some of these wires go to speakers to the sides of the roof panel above the front seats, others go to the an elaborate electrical box mounted in the rear fender to house an external AC plug-in and outlets for accessories.  The speakers  were still installed, but were very worn out and we removed and  discarded them when we redid the roof panel.  All the wires are still in place.
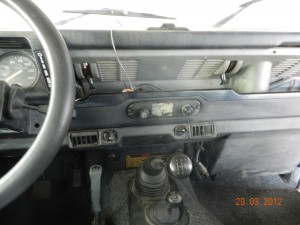
Original dash, with basic oval panel for rear wiper switch and accessory plug visible. Note ventilator levers and vents under the upper dash

Our ideas for upgrading the dash range from creating and installing attractive hardwood “glove-box” doors that would hinge from the flat bottom lip of the dash to close under the top dash.  This would add some visual ascetic appeal as it would  conceal the open area.   The downside is that these cover the vents that are designed to allow air to flow in (or, as James May of  Top Gear jibed “just in case it isn’t noisy enough inside already”), but this is not such a concern when we have air conditioning.    I have even purchased some mail-order hinges from a cabinetry shop in Canada (Lee Valley) that may work for the this, finding the hardwood here that is thin enough is proving to be more of a challenge.

However none of this addresses the problem of how to mount a radio.    This vehicle must have had a radio, the wires are still there, as are two now-defunct 6 1/2 inch speakers mounted in the ceiling panels above the front doors on either side, but there is no evidence of where the radio might have been mounted.  There are no holes that suggest there might have been a radio housing screwed in somewhere.   However, none of this addresses the problem of how to mount a radio/CD player.   No holes remain visible in any part of the dash that suggest screws were once mounted there.

We opted to get a console from MUDSTUFF,  www.mudstuff.co.uk/index.shtml , a company in England that produces a range of  aftermarket accessories designed for Land Rovers.  The console is simply a plastic form that comes with a metal mounting frame and installation instructions.  The user can choose whether they want to use the console to mount switches, meters, a radio, and the precise location of each.  I ordered the console, a radio mount, an additional plug-in for AC power and some switches for lights and other accessories.

Installation was not terribly difficult, although  it took longer than it would have if I had access to the tools I have storaed in Canada.    I did bring a set of basic hand tools with me, which I have supplemented with a ratchet set that I purchased here.  I am getting good use of all these, but I do not have any power tools.  I had brought a set of light Black and Decker battery-operated tools,  but the charger is not working here and it is only possible to get very light work done before the batteries expire.   To install the console it is necessary to remove a section of the dash that requires cutting through a foot long section of metal.  Getting the tool to do this proved to be the most difficult and time-consuming part of the project.
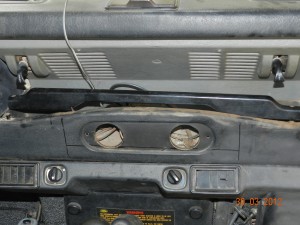
Original switch panel removed and dash marked for cut-out

I asked around to see who might have an electric hacksaw and ended up dealing with James, who is a contractor to the property management team at the High Commission where I work.  James came by and quickly determined that a hacksaw was not going to do the job and we went off together last  Saturday morning to a metal shop that had a “grinder”.   This is a fairly heavy duty rotary tool that can be mounted with a range of different 4″  blades.   It was noisy, messy job that took about 20 minutes and GHC 15 ($10), with another GHC 20 for James as fixer,  a role which in addition to getting me to the grinder included some other drilling work in the console panel itself that he did with his own electric drill.
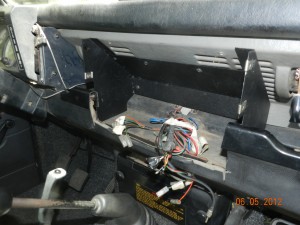
Dash cut out and console mounting frame installed. Note the A/C unit has been temporarily removed

At this point there is a bit of a sick feeling because all you have is a big gash in the dash and the panel that held the lighter and rear windshield washer switch is gone.   From there is was more satisfying.  The metal mounting plates for the console screwed into the area between the vent levers without difficulty.  The vehicle has a plastic trim piece that runs along the top of the bottom front lip of the dash catch area that has to be cut.  I had to stop in the middle of the installation to go up to Opere’s to borrow a simple hacksaw blade to cut the trim because I don’t have one of those either.   It took five minutes to do the  cutting but almost an hour to get there and back.  I really miss my tools.

The biggest challenge was adapting the console and the air conditioning unit.  Distribution of A/C in a Defender, at least in ours, consists of a 2-3″ high channel that screws snugly along the flat bottom of the dash.   The MUDSTUFF console has a wide plastic flange e that is designed to slip between the A/C unit and the dash, which helps to establish a firm footing for the console.  Unfortunately, I had recently had my A/C unit remounted complete with a screw right in the area where the flange has to go, which prevented the console base piece from slipping in.  The amount of time I had to spend unmounting and remounting the A/C unit before I realized all I really had to do was cut the flange was incredible.
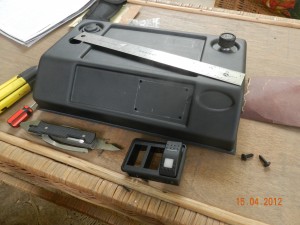
Console front with cut-out marks for switches and radio; original wiper switch and 12V accessory have been installed.

Cutting the holes in the console required some precision, and again the lack of tools was a pain.   I could mark out the places for the radio, the switch plates, and the AC power converters (cigarette lighters), but cutting them out was more difficult.    I was able to coax enough power from my B&D battery operated drill to cut round holes in the corners of the square holes for the radio and switch plates, but had to get James cut the lines to complete the job.  With that I was able to mount everything into the console and install it.  It is only a temporary placement of course ,  we don’t have speakers yet for the radio, or light to hook onto the switches yet, but the unit can be easily removed with three screws to get at the backs of the switches and the radio casing to complete the hook-ups.
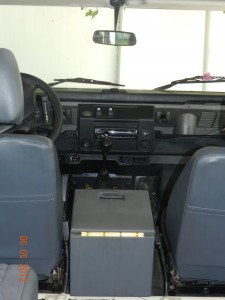
Finished Product Installed with Radio and Switches


We still have to run the wires to the unit for radio and switches, but I am waiting for the lights from SA Africa (separate post coming on “a shopping trip like no other”) and we are still in the market for speakers, that one is getting to the top of the priority list .

Other project ideas for the interior front include the replacement of the vinyl-trimmed top of the cubby box between the front seats with a more attractive hardwood panel, and doors fro the dash from the same material.  Then there are a  whole list of things to do to make the cargo bay expedition ready.  One of my biggest problems now is limited time.  There is only so much you can do on weekends, I need to stop working long hours in the office, and using my vast stores of accumulated leave to devote to the Landy project.
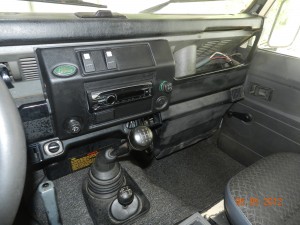


Finished console with radio and switches for front running and rear area lights. Set up to accommodate two additional switches if required.

The Saga of the Furtive Form C

My reluctance to write anything about the challenges of getting the legal registration for the Defender was due to two things: fear and ignorance.    First of all my lack of understanding of what was actually going on at any point led to a few mistakes and  limited my ability to say anything intelligent (ignorance),  and my gradually declining confidence that it was ever gong to lead to a positive outcome made me feel rather embarrassed(fear) .   There were moments, indeed days, when I thought I had screwed up so badly that not only was our trip in jeopardy,  but our ability to export the vehicle from Ghana at all, ever, was in serious doubt.  I could have done fifteen blogs on this story, but they all would have been too depressing.  Only now can I see the light end of a very long, multi-branched tunnel.   I have used fictional names for many of the individuals in this story in order to spare anyone from embarrassment or other trouble.

We bought the Landy from someone named Gomez, to whom I was referred by Opere the Land Rover mechanic that runs the shop under the tree.   I had put Opere to work to find us a fifteen year old Defender 110 that could be legally imported to Canada.   (See separate post “We find our Defender”)   I purchased the vehicle and obtained a bill of sale.  Obviously I knew I would need to eventually register the vehicle, but that was not something that could be even contemplated at that point, first it had to be in a condition that was a) drivable and b) able to pass a basic safety check .  It was a long way from satisfying those conditions a year ago.

After the first few months of mechanical and body restoration, when we got close to having a vehicle that would pass muster I asked Ruby, the admin person at the Canadian High Commission that deals with vehicles where I work what I had to do to register it.   She asked if I had all “the papers”, and  explained to me that “Form C” was of some importance.  This is something that is signed between the seller and the buyer that contains certain specs on the vehicle, like make, model, year, and chassis number.   No-one had offered that when I first bought the vehicle, and I was not keen on going back to see Gomez so when I was about to leave for our trip to Egypt last October I arranged for Opere to follow up with Gomez to get said Form C.  When I came back Opere said he was having trouble with Gomez and that I should go see him myself to see what the problem was.

I called Gomez and learned at that point he was not the actual seller of the vehicle, but rather someone named “Andy”,  his “brother”.   Gomez said there was no problem, that he could get Addy to sign a Form C passing ownership to me.  Laura and I went to see Gomez one Saturday, in his chair under the stairs at the front of a decrepit two-storey walk up retail/office building in Dansoman where we had bought the vehicle.  He not only had a Form C signed by Addy and pictures of the gentleman, but the original of a letter sent from the Environmental Protection Agency (EPA), the original owner, to the Driver and Vehicle Licensing Agency (DVLA), attesting that Addy had indeed purchased the vehicle from them at auction and asking DVLA to transfer ownership.  Said correspondence was dated March 2011, a month after I had purchased it from Addy, which struck me as a bit curious.

But finally after months of dead-ends, it appeared I was home free and could get the Landy licensed.  At this point the brake lights were not working and these needed to be fixed before it would pass the safety so I did not pursue it until I got those fixed   A few weeks ago I went to DVLA and entered another stage of the twisted path.   I went to DVLA with Francis because I wanted a Ghanaian who knew how things worked and he knew someone there.  This led to the two of us sitting in the office of a DVLA official, who we shall call Sam , watching him stamp other people’s forms and bark orders to staff.   When he finally decided to give us the honour of his attention, he asked who had sold me the vehicle and if I knew him.  The fact that I had the letter from EPA,  pictures  of Mr. Andy and a signed Form C did not impress him. He wanted to meet Mr. Andy before he would go any further.  He lectured us about the risks of transferring vehicles that were stolen and said he did not have anything in his files about the sale of this vehicle.   At one point he actually said that he if I did not like it I could go see his Director (who works in another location) or I could just return the vehicle to Mr. Andy and ask for my money back.  Not an uplifting day.

By this point the prospect of throwing myself into the sewage laden surf on the rocks in the ocean off Accra has begun to look like a rather attractive option.    I had by this time invested over ten grand in the vehicle but I had serious doubts this Andy fellow actually existed, a doubt no doubt shared by Mr. Alright.  I was very suspicious that perhaps Gomez had  stolen the vehicle and orchestrated a fictional vendor  to clear himself of accountability.  Would I be able to get someone to masquerade as Addy?   Would I never be able to register the vehicle, and would I have to abandon it when we left Ghana?


A Shopping Spree Like No Other

Now that the restoration stage is pretty much complete we have to get serious about adding the things that will make our Defender usable for overland travel.   This involves planning for and procuring a whole range of systems (see separate Feb. 2012 post “Planning the Outfitting Stage”)    Unfortunately, there is really nothing at all one can get in Ghana for this, nor do any of our internet suppliers include much expedition gear in their offerings.   We decided that the best way to deal with this is to go ourselves to South Africa to buy stuff   Our trip to South Africa  included the My Land Rover has a Soul Festival (see separate post “Woodstock for Landy Lovers”) and a side trip to  Victoria Falls, as well as a few days exploring the amazing Blyde River Canyon in northeastern South Africa.  But the real purpose was shopping.

South Africa is arguably  the best source for expedition outfitting gear in the world.  There are many manufacturers and many more distributors.   We had seen some of this during our first visit to South Africa in 2010 (see Jan. 2011 post on Testing the Idea in South Africa) and were able to make a list of things we might want to pick up on a return visit.  We made that return visit in late February equipped with a list of about twenty items we needed and another list of a half dozen stores/suppliers to look at.  The latter ranged from big box  camping stores like Outdoor Warehouse to excellent 4×4 outfitting specialist stores like Front Runner 4×4 or Safari Centre, as well as suppliers of specialized items like solar power systems or awning canvas suppliers.  All the photos in this post are stock photos from the suppliers, our own stuff is still on a boat somewhere en route to Ghana.

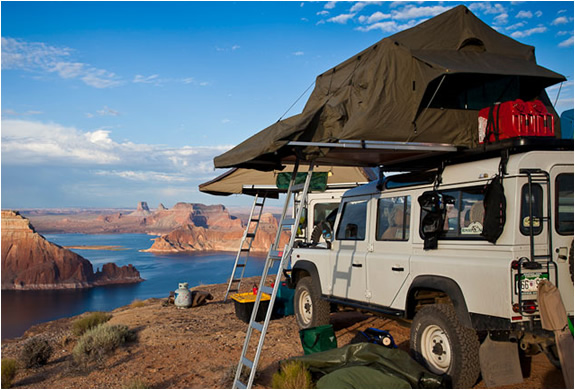
Rooftop Tent:    Our experience renting an outfitted Defender introduced us to the concept of a hard floor canvas tent that bolts to a rooftop carrier. (see Jan. 4, 2011 post, Testing the Idea)  The roof rack that came with our Defender will accommodate this very nicely. There are a few tent products available from different places, ranging from South Africa, Italy, Australia, etc.  This is the largest, (heaviest) and most costly piece we need so we invested a fair bit of time looking at the available options.     After doing lots of research we  settled on the Eezi-Awn Jazz tent, a first-class quality and tested product of South Africa.  Weighing in at 55 kilos there is nothing like this really.  Erects quickly and easily via a ladder that comes out from underneath  the floor and fills our need quite nicely.  This is what we had for our earlier test run in South Africa trip and we loved it. Now we own one.

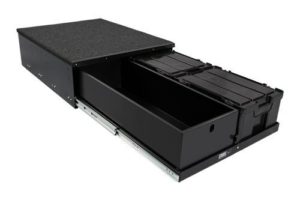
Storage Drawer System.  As we learned from our earlier rental, the design of the Defender cargo bay supports the installation of a flat floor between the wheel wells in the cargo bay which creates a 1′ high x2′  wide x 4 ‘ deep space and lends itself well to installing drawers that then open out the back when the cargo bay door is open.  Frontrunner 4×4  www.frontrunner.co.za  in Johannesburg produces a great drawer system using simple and affordable  “ammo” boxes.

In the Defender we rented from Bushlore it was this system that they used to carry all the kitchen gear and some other miscellaneous pieces.  We liked it so much we went back to Frontrunner and bought one.  There are other makers of 4×4 drawers but we did not see anything that was as cost-effective.  I was very surprised to see a review of drawer systems carried in the Winter 2012 issue of Overland Magazine did not even seem to acknowledge the existence of this South African product.  This is likely because of the American base of that magazine, but I think they missed the best product.

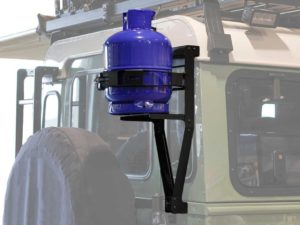
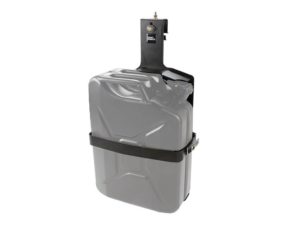
 Propane and Water Storage.    One  can buy jerry cans in Ghana but they are very expensive and they do not come with harnesses to mount them.  We looked at various floor and wheel well fuel and water storage systems that Frontrunner or others make for Defender but decided these were more that we needed or could organize for and opted instead to pick up stock water and propane tank  carriers designed to fit on the side and rear exterior walls of a Land Rover Defender.

Propane Tank Rack from Front Runner

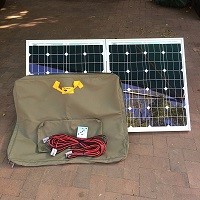
Solar Power System:   After some on-line research we decided that back up power to help ease the draw on the vehicle battery when parked is a worthwhile investment.   Like so much to do with overlanding there is enough demand for this in South Africa to support a couple of specialist suppliers.  The one we visited was Bushpower http://www.bushpower.co.za  run out of the garage of a suburban house in Kyalami on the northern reaches of Johannesburg, only about two kilometres from the Frontrunner store and factory.   The panels and related wires and switches are all imported, mostly from Europe.  We purchased an 85 watt panel with mounting and cables, together with a dual battery monitoring system.

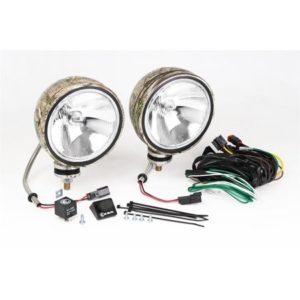
Lights:   The front headlights on our Defender are not the brightest I have seen and our comfort driving at night will be greatly facilitated by additional lights.  It is quite common for  4x4s  to be equipped with an extra set on the bumper or roof rack.  I had been looking at 70 watt  Lightforce from Australia but the only place I saw them they were very expensive relative to other quality options.  We opted for a product called KC, which I believe is an American company based in Arizona.   These were recommended by the Safari Centre store in Centurion which carries a range of very high quality 4×4 products. 

Because it gets dark at 6:00 PM here we also need to have an area light for meal prep and eating at night.    We happened to notice one type in particular on the backs of three Land Rovers in parking lots our first couple of days in Jo’burg and when we saw exactly the same light in Frontrunner we figured it must be good so we picked it up.

Canvas for Awning:   There are a number of roll-up awnings available in the market, including a range manufactured by Eezi-Awn tent producer.   There is value in having something to provide protection from the sun and rain, but the  manufactured awnings all seem expensive and require quite a bulky, heavy case that mounts permanently to the side of the vehicle.   I came up with our own awning design (see separate Awning Made to Measure post for details) for which we needed some material.   We thought of this when we saw a store that sells awnings for windows and decks and went in to have a look. As it turned out they did not sell material itself, but the helpful woman in the store referred us to a place called Home Hyper City near Pretoria, where she said we should see Uncle Joe.   The store was the largest fabric store we have ever seen two floors the size of a football field, really incredible. We found Uncle Joe and explained what we were looking for to which he replied “oh, for your baakie?”  A baakie is the term South Africans use to refer to what North-Americans know as pick-up trucks,  but the term can also be used to refer to any 4×4.  He led us to a row where they had a range of weights and colours of canvas and we picked up a couple of metres of canvas in two colours that will look good together and complement our own “baakie” quite  nicely.

Miscellaneous:  We bought a few things that were not on our list to supplement the miscellaneous items we had purchase in December 2010.    A funnel, speaker wire, fastening straps, an ammo box for the roof with a water proof cover to hold sundry items like souvenirs purchased along the way, silicone spray for the awning, etc.  When the shipment finally arrives in Accra we will no doubt be pleasantly surprised by things we have forgotten we purchased.  It will be like Christmas, hopefully it won’t take that long to get the stuff!

By the time we were done we were glad we had bought the fridge and other outfitting gear the first time we came to South Africa from Ghana because after 3 days of nothing but shopping we had run out of time and had to go back to Ghana.  The purchase of  all these items came in the last few intense days of our time in Johannesburg, after our trip to Victoria Falls and the Blyde River Canyon.  The most difficult part was arranging shipping.  We had started the process weeks before we left Ghana through a company that brings things in to Ghana from South Africa and this led to a recommendation to rent partial space in a container to be sent by sea as an inexpensive option.  It was indeed a very affordable option, unfortunately the Jo-burg forwarder we had been referred to turned out to be non-responsive and we had to go back to the original contact to try to get their attention and this led to referral to another forwarder. They turned out to be much more responsive, but it all took awhile to arrange and it not until our last couple of days in Jo-burg we had settled with them.  We had to impose upon the Safari Centre 4×4 store in Centurion (between Johannesburg and Pretoria) where we bought the tent, second battery, lights and other accessories to hold all our things, not just what we bought there, but everything from all the suppliers, until the forwarder could come by to get it.  They agreed to do so, and we delivered all our other sundry items to them the day before we left,on the understanding that the forwarder (Synergy) would retrieve it in the next couple of days.  It actually took Synergy more than two weeks to get around to picking the stuff up, which also meant they missed the sailing of the boat they had initially said we could use.  Thanks very much to the Centurion Safari Centre for helping us out in a jam.

Now we are waiting to get our things to Ghana.